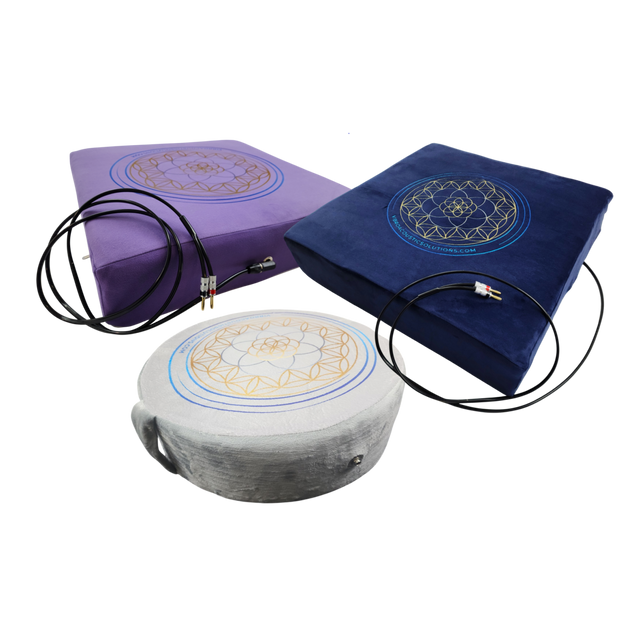
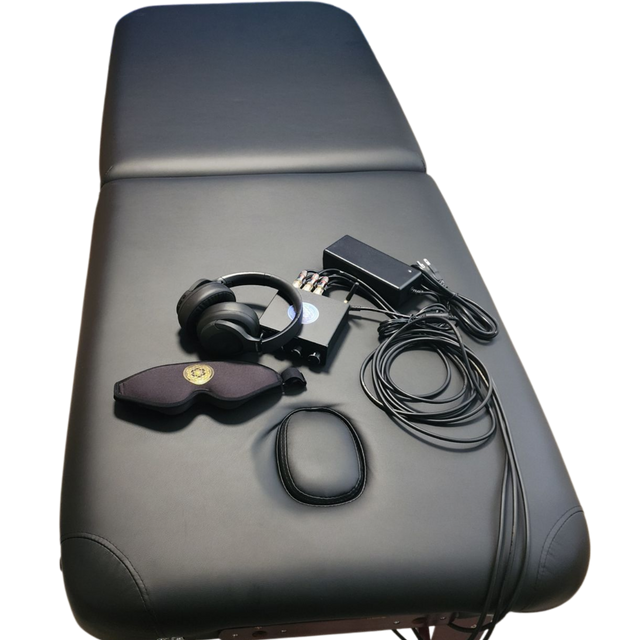
A treatment table can look unchanged after installing furniture transducers, yet feel completely different when a low-frequency program begins. Instead of hearing sound only through the air, the body receives it through the surface beneath it. The transducer converts an amplified audio signal into mechanical vibration, allowing carefully selected frequencies to travel through the furniture frame, cushioning, and body as tactile sound.
This is the central principle of vibroacoustic therapy: frequency becomes a felt experience. At lower ranges, commonly around 20 to 120 Hz, vibration is less about musical detail and more about physical resonance. A well-built system can create a grounded, enveloping sensory environment for rest, recovery, therapeutic bodywork, and nervous system regulation.
Why Furniture Can Become a Therapeutic Sound Surface
A furniture transducer, sometimes called a tactile transducer or vibration exciter, is not a conventional speaker. A speaker moves air to create audible sound. A transducer is mounted directly to a solid surface and transfers energy into that surface. On a bed, recliner, massage table, or floor cushion, that energy becomes distributed vibration.
The furniture itself shapes the experience. Dense plywood, hardwood, and structurally sound table frames generally transmit low frequencies more efficiently than thin particleboard or loose metal frames. Foam, upholstery, body weight, and mounting position then filter and spread the vibration further. This is why the same 40 Hz tone can feel focused and strong on one treatment table but soft and diffuse on another.
For many users, frequencies between 30 and 60 Hz create a substantial, settling sensation through the torso and hips. Frequencies in the 60 to 90 Hz range may feel more defined and stimulating, while deeper content from roughly 20 to 35 Hz can be experienced as slow, spacious pulses when the furniture and amplifier can reproduce it effectively. The ideal range depends on the client, the goal of the session, and the physical design of the surface.
Studies of vibroacoustic interventions have explored low-frequency sound for relaxation, pain experience, movement support, and stress-related symptoms. Researchers are particularly interested in the way rhythmic vibration, music, controlled breathing, and a comfortable resting position can work together as a multisensory regulation environment. For practitioners, that means installation quality matters: the system should feel stable, predictable, and easy to tailor.
Choose the Right Furniture Before You Install
The best candidate is not always the largest piece of furniture. It is the piece with a rigid, accessible structure, enough clearance for safe mounting, and enough comfort to support stillness. Massage tables, platform beds, recliners with solid bases, and sturdy benches are common choices. A lightweight folding chair or a damaged bed frame may rattle before it delivers useful vibration.
Start by inspecting the underside. Look for a central rail, cross brace, or flat wood panel that is strong enough to accept hardware. Avoid mounting to a removable drawer, thin decorative panel, or any component that flexes significantly when pressed. On an upholstered piece, you may need to remove a dust cover temporarily to reach the frame, then replace it after installation.
A massage table deserves special consideration. The transducer must not interfere with folding legs, cable routing, height adjustment, face cradle hardware, or client access. For professional rooms, the equipment should remain visually calm and simple to sanitize. Concealing wiring is useful, but never at the expense of ventilation, inspection access, or electrical safety.
A Step-by-Step Process for Installing Furniture Transducers
Before mounting anything, confirm that the transducer, amplifier, power supply, and audio source are compatible. The amplifier must support the transducer's impedance, typically measured in ohms. A mismatch can reduce output, trigger amplifier protection, or place excess strain on the equipment. Follow the specifications supplied with your system rather than estimating power requirements from appearance alone.
1. Find the most effective mounting location
For a single transducer, a location near the center of the structural frame often distributes vibration evenly. On a massage table, this is commonly on a central crossmember beneath the torso area. On a bed, mounting near the middle third of the frame can create balanced transmission from shoulders to pelvis.
Do not assume center placement is always best. A recliner may transmit more cleanly from a reinforced base, while a long table may benefit from two transducers positioned symmetrically. The goal is not maximum force at one point. It is a consistent tactile field without distracting hot spots, buzzing, or vibration loss at the edges.
2. Mount to structure, not soft material
Use the hardware specified for the transducer and secure it to solid wood or another manufacturer-approved structural surface. The mounting face must sit flush. A loose screw, warped bracket, or uneven contact surface can create mechanical noise that competes with the therapeutic signal.
Pre-drilling pilot holes can help prevent wood splitting. Keep screws clear of the furniture's top surface, foam layers, and moving parts. If you are modifying a valuable antique, an electrically adjustable bed, or a table used in a high-volume clinic, professional installation may be the wiser choice.
3. Route and secure the wiring
Run speaker cable along the underside of the furniture, following stable frame lines where possible. Leave a small amount of service slack near the transducer so the cable is not pulled tight during movement or transport. Cable clips, protective sleeving, and strain relief reduce the chance of snagging or accidental disconnection.
Keep low-voltage speaker wiring separate from power cables when practical. Place the amplifier in a ventilated location where controls remain reachable but clients cannot step on cables or accidentally change settings. In a clinical setting, a labeled power switch and a simple startup routine protect both the equipment and the therapeutic flow.
4. Test at low volume first
Begin with a sine wave, low-frequency sweep, or familiar vibroacoustic audio track at a very low level. Listen for rattles at joints, loose feet, headboard hardware, decorative trim, and nearby objects. A rattle is not a minor cosmetic issue. It can make the nervous system work harder to orient to the sound instead of settling into the experience.
Increase output gradually while lying or sitting on the furniture. Test several frequencies, such as 30, 40, 50, 60, and 80 Hz. Notice where the vibration is clear, where it becomes uneven, and whether any part of the frame resonates excessively. Tightening hardware, adding felt isolation at a noisy contact point, or shifting the transducer a few inches can make a meaningful difference.
Calibrate for Therapeutic Comfort, Not Maximum Output
More power is rarely better. The most useful setting is the lowest level that creates a clearly felt, comfortable vibration across the intended contact area. Excessive intensity can make a surface feel mechanical or fatiguing, particularly for people with sensory sensitivity, acute stress, or trauma-related tension.
Use the amplifier gain as a ceiling, then make session-by-session changes through the audio source. This preserves a safe baseline and gives practitioners finer control over the experience. Gentle volume transitions, a gradual fade-in, and a calm ending often feel more supportive than abrupt starts and stops.
Music matters as much as raw frequency. Slow rhythmic material with intentional low-frequency content can feel organic and emotionally grounding. Pure tones are useful for calibration and focused frequency work, while layered music may create a more spacious experience. Many people also enjoy frequencies with personal or cultural resonance, including 432 Hz music, when paired with a low-frequency tactile foundation that the furniture can reproduce.
Common Installation Problems and What They Reveal
If the vibration is weak, the cause may be an underpowered amplifier, an impedance mismatch, a mounting point that is too flexible, or audio content with little energy below 100 Hz. If one area feels much stronger than another, test a different mounting position before adding more power.
If the furniture buzzes, inspect every mechanical connection. Loose bolts, metal brackets, caster wheels, wall contact, and objects stored beneath the bed can all become unintended resonators. If vibration is audible in an adjacent room, isolation feet or relocating the furniture away from shared walls may help preserve privacy.
For clinics, document the setup once it is dialed in. Record the mounting location, amplifier setting range, preferred programs, and any room-specific considerations. Consistency allows the technology to support your clinical presence rather than demanding attention during every session.
A properly installed transducer does not need to announce itself. When the structure is solid, the wiring is secure, and the frequency is chosen with care, the furniture becomes a quiet therapeutic instrument - one that gives the body a steady place to receive sound, settle, and reconnect.
Latest posts